Today I will share with you 10 snacks that you can make at home.
Let’s take a look below.
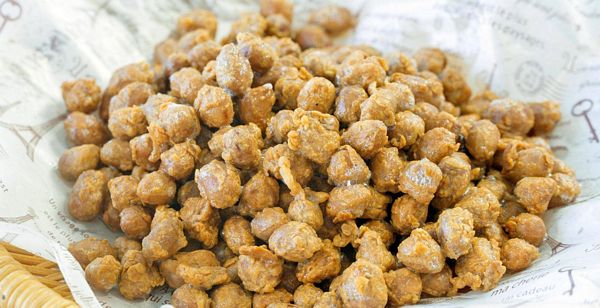
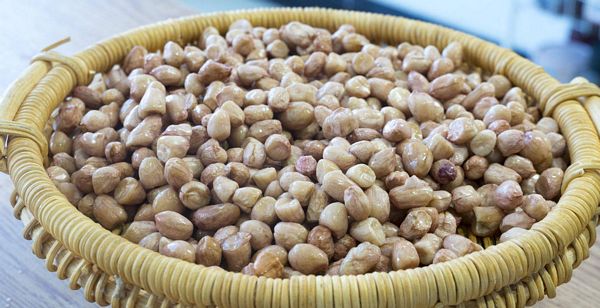
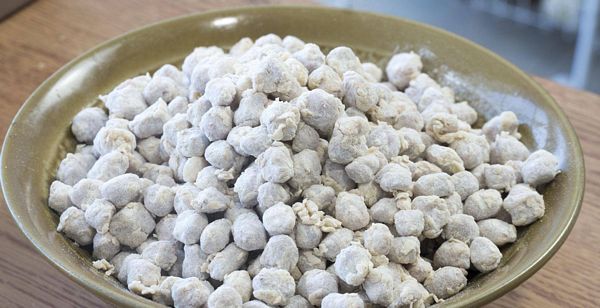
1. Peanut Crisp
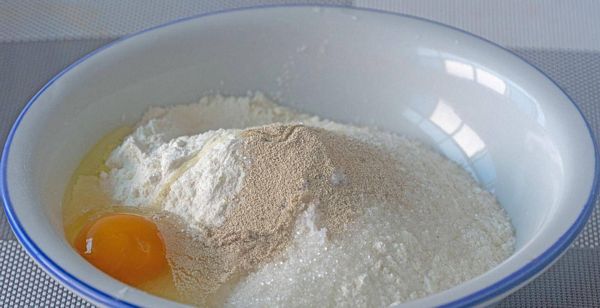
3 catties of peanuts, 1 spoon of salt, 2 eggs, a little flour, pepper, chili powder, five-spice powder
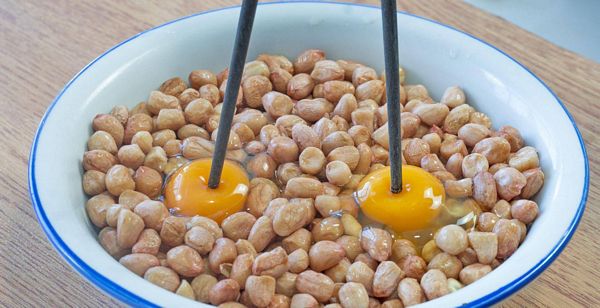
1. Wash the peanuts first, add 1 spoon of salt after adding water, wash off the dust on the surface by hand, and then soak for 5 minutes;
2. Then pour out the soaked peanuts and drain the water, let the water dry a bit before adding 2 eggs;
3. Then seasoning, salt, pepper, chili powder, five-spice powder, stir evenly with chopsticks, so that each peanut is coated with a layer of egg liquid;
4. After stirring evenly, add the flour gradually.
Add small amounts frequently. After adding the flour, stir well with chopsticks to ensure that the peanuts are evenly coated with the flour, and keep adding until each peanut is fully coated.
a layer of white flour;
5. Then use a colander to sieve off the excess dry powder on the peanuts, so that the taste will be better after sifting once, and the smell of flour will not be too heavy;
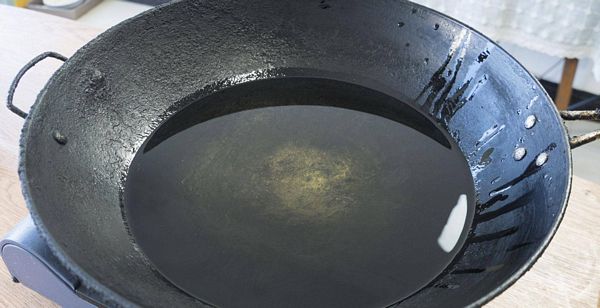
6. Take the pot and pour oil, you can pour a little more, first turn on the fire to heat the oil, you can test the oil temperature with chopsticks, small bubbles will appear immediately when the chopsticks are lowered, then pour in peanuts;
7. At this time, fry slowly with medium and low heat throughout the whole process.

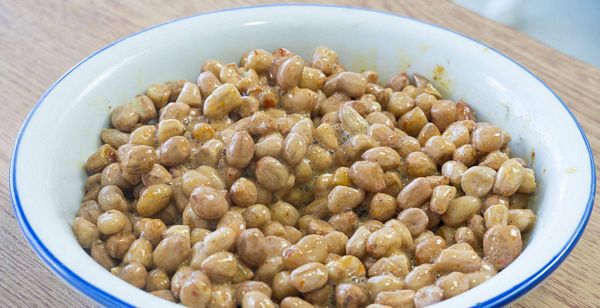
Don’t be impatient. Slowly fry over low heat until crispy. The time is about 10 minutes. At this time, the peanuts will be fried golden and crisp. Take them out first.
Come;
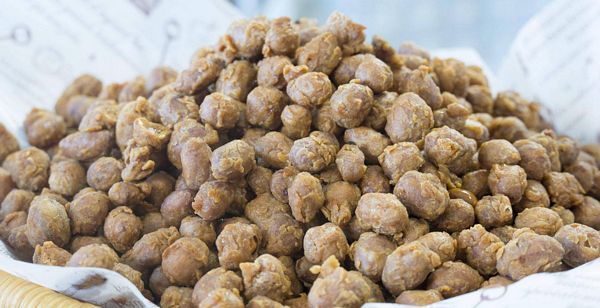
8. Then heat the oil in the pot over high heat. After the oil is hot, turn to low heat, then pour in the peanuts and fry. Remove and drain the oil within 10 seconds.
At this time, the color of the peanuts will become slightly darker, and the taste will be more crispy.

Because the outside is coated with flour, it tastes more unique and crispy. Serve a plate during the Chinese New Year, the elders can drink a few cups comfortably, and the children can also eat it as a snack!
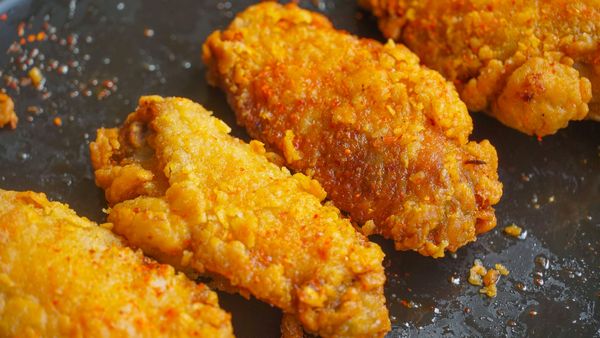
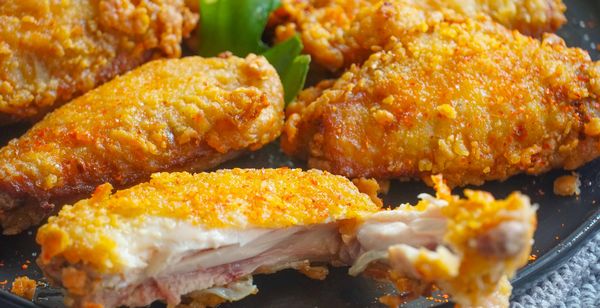
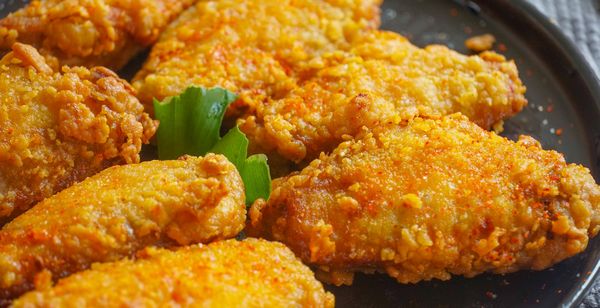
2. Fried chicken wings
1. Wash the chicken wings first. Add a spoonful of flour to a pound of chicken wings. Flour absorbs dirt and oil better.
After washing for two minutes, wash several times.
2. Prepare a handful of spicy millet. If you like spicy food, you can add a little more. Half a head of garlic.

The garlic flavor complements the peppery aroma even more.
3. A spoonful of five-spice powder, a spoonful of pepper powder, a spoonful of salt, half a spoonful of brown sugar, a large spoonful of soy sauce, a large spoonful of yogurt, if there is no yogurt, replace it with water.
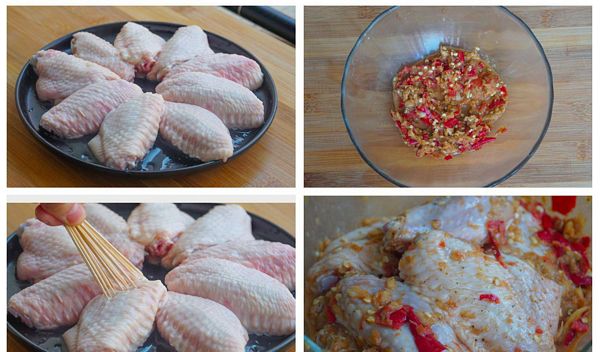
Cover with plastic wrap and puree. It can also be beaten directly with a stir-fry stick. will be simpler and faster. But the taste of hand pounding will be more fragrant and longer lasting.
4. Prick the chicken wings with a toothpick, it will be more delicious when marinated. Give it a stir. Can be grasped by hand. But be sure to wear gloves.
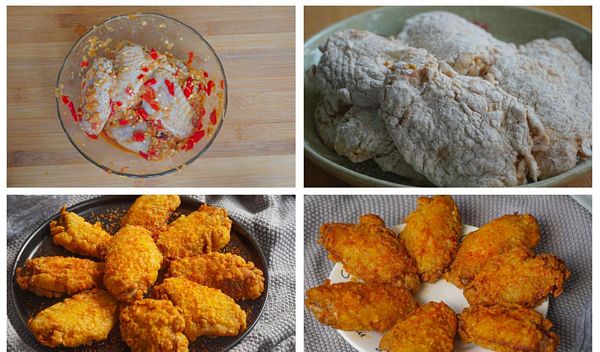
5. Marinate for 3 hours, take it out and stir in the chicken wings, and then coat the flour with the sauce on the surface.
6. Mix 60 grams of plain flour and 60 grams of cornstarch, put in the chicken wings, and coat each corner of the chicken wings with flour.
There are two points to note here. The gloves are dipped in flour, and the second is to shake off the excess flour, so that the fried chicken wings will be more crispy.
7. Now pour in oil, you can pour a little more, turn on high heat to heat, use chopsticks to test the oil temperature, when there are small bubbles around the chopsticks, you can turn to low heat to serve chicken wings.
8. After frying for a while, gently turn over the bottom, fry for 3 minutes and remove.
At this time, the chicken wings are not fully colored. Continue to turn on the fire and prepare to fry again. Use chopsticks to test the oil temperature in the same way.
9. After reaching the temperature, turn to low heat and add chicken wings. At this time, it does not take a minute to boil the pot. The surface looks golden and crispy.
10. Sprinkle some salt and chili powder while it is hot, and you can also sprinkle cumin.
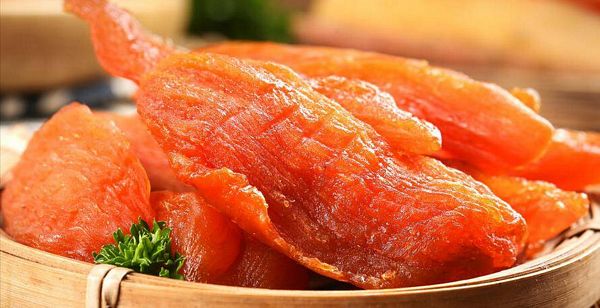
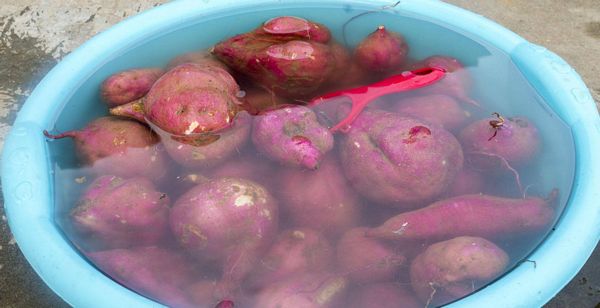
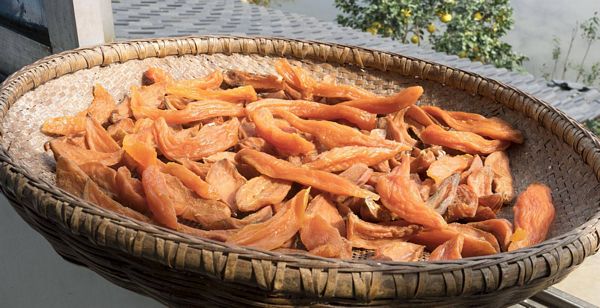
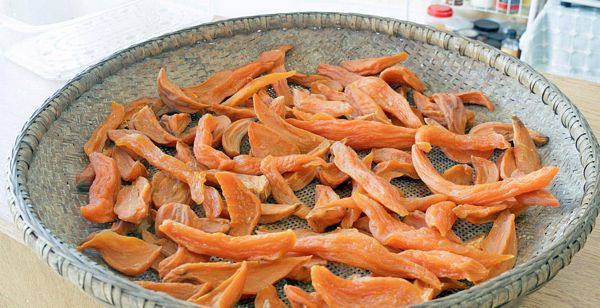
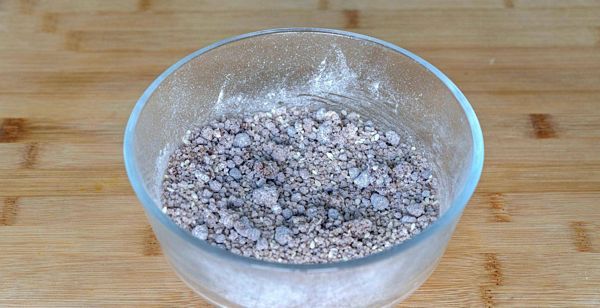
3. Dried sweet potato
1. Wash the sweet potatoes first, there is a lot of mud, I washed it several times
After washing, peel off all the skins of the sweet potatoes.
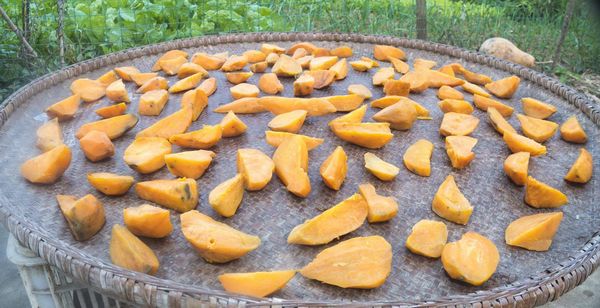
My cauldron is a colossal project, and it’s finally done. Now let’s chop the big sweet potatoes. If the sun is big, you don’t need to cut them very small.
taste like meat;
3. Then pack it up and start to bask in the first rays of sunshine. 1-2 days is enough if the weather is good
The sweet potato at this time is not particularly dry, it is too big, we can make it smaller at this time;
4. Then put it into the steamer and start the second steaming.
Be sure to use high heat, because the dried sweet potatoes steamed at high temperature will be more fragrant and sweet.
The steaming time does not need to be too long, about 8 minutes is enough;
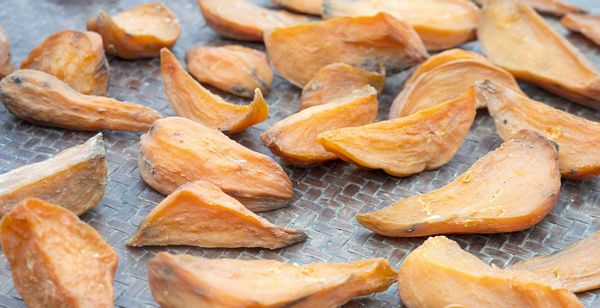
5. Then pour it out to bask in the second sun. One more day is enough.
If it rains, it can only be dried in the oven or dried in a fruit dryer. Before doing anything, be sure to check the weather in advance;
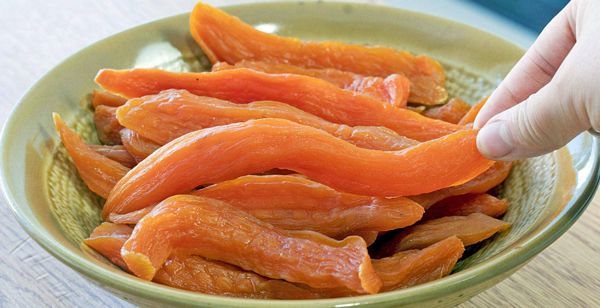
6. After the second drying, the sweet potatoes are already very dry.
We continue to put in the steamer and start the third steaming. The third steaming can make the sweet potato dry softer and longer. The time is 10 minutes on high fire;
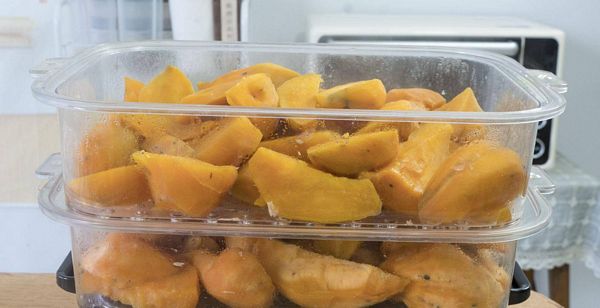
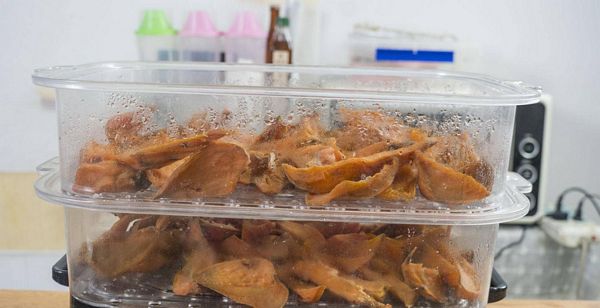
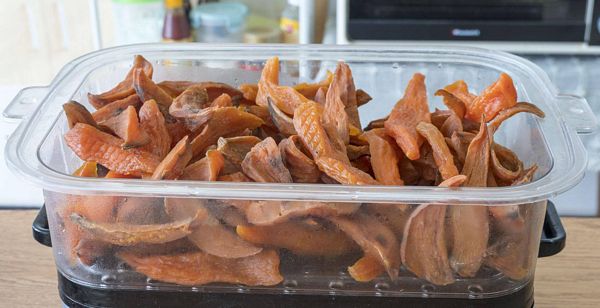
7. Then pour it out and dry it for another day until 80% dry.
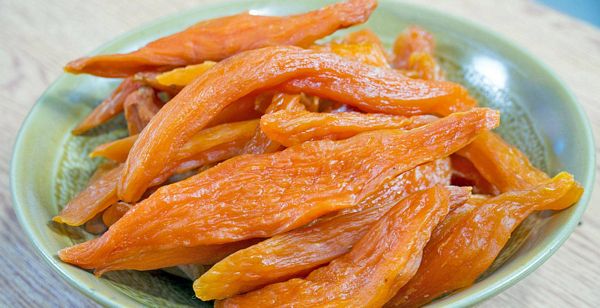
Dried sweet potatoes can be eaten directly;
The sweet potato at this time has a strong aroma and a full color. The dried sweet potatoes made by the ancient method of three steaming and three drying are soft and not sticky to the teeth.
They taste naturally sweet and not greasy at all;
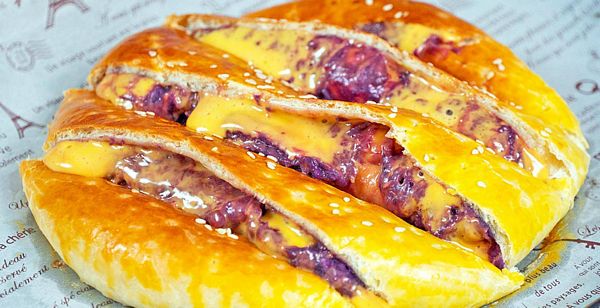
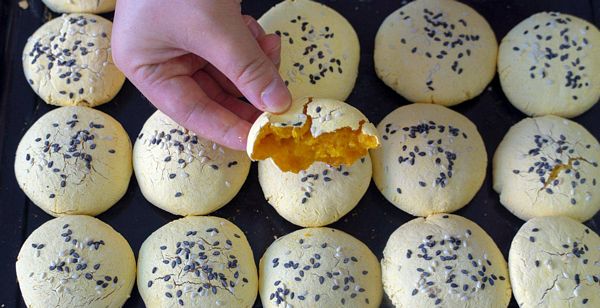
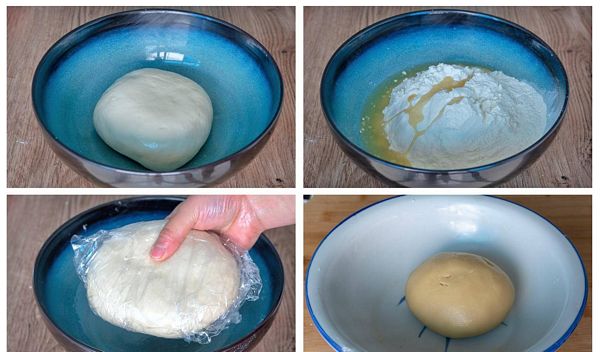
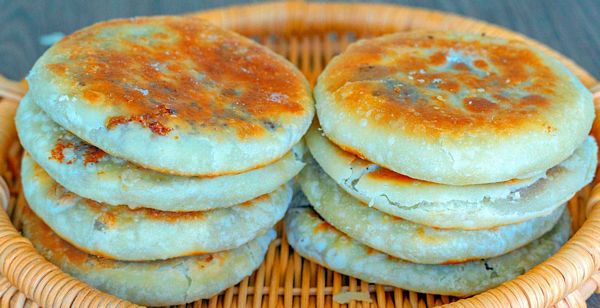
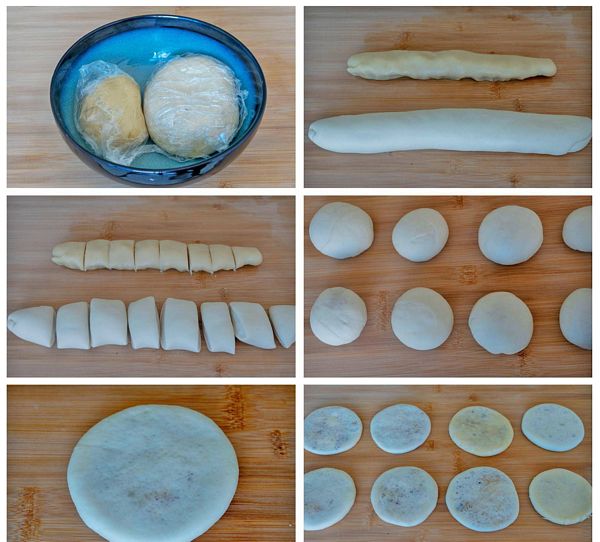
4. Burst Purple Potato Cake
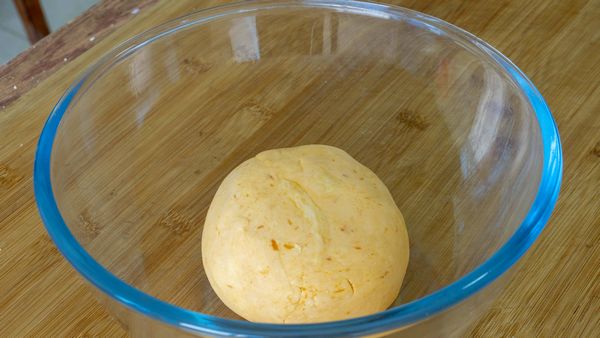
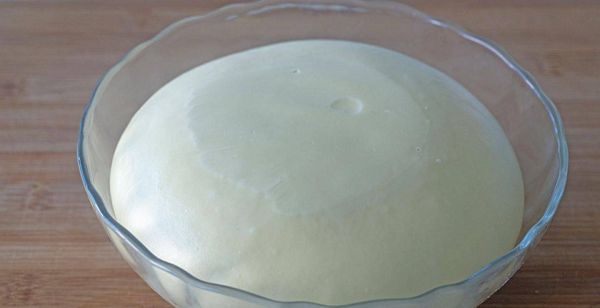
1. Add 300 grams of flour, 4 grams of salt, 6 grams of sugar, 3 grams of yeast, 40 grams of butter, and 160 grams of milk.
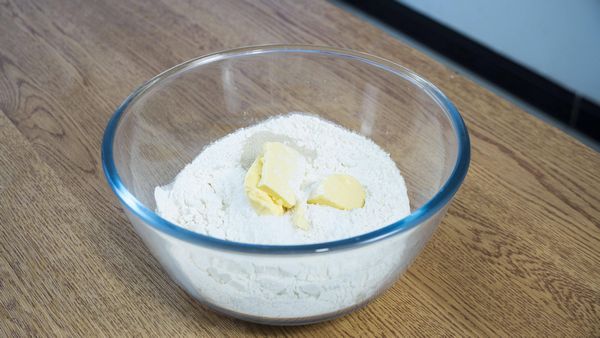
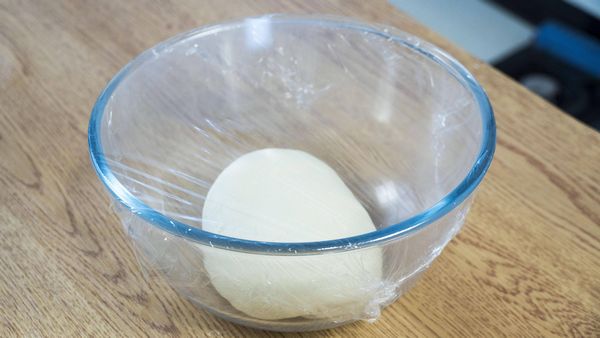
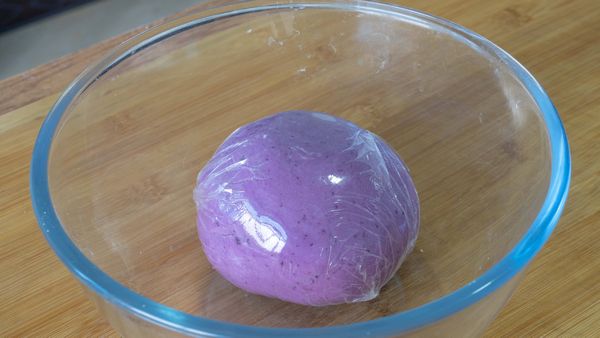
Add in portions, knead into a smooth dough, cover with plastic wrap and let stand for 30 minutes;
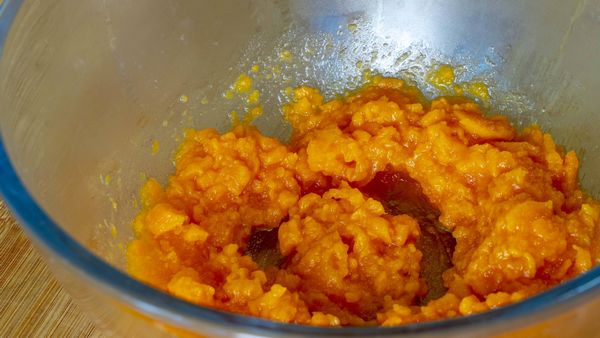
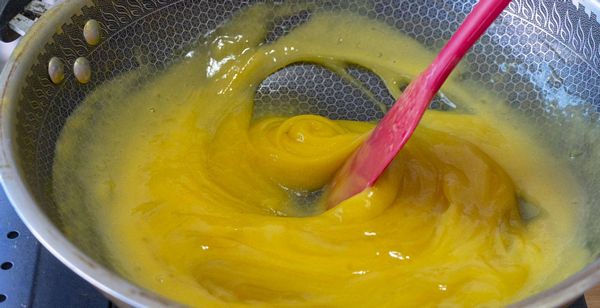
2. Now let’s deal with pumpkin and purple sweet potato.

Peel the purple sweet potato, peel the pumpkin, cut into small pieces and put them in a bowl, each weighing 150 grams;
3. Now steam the purple sweet potato and pumpkin.
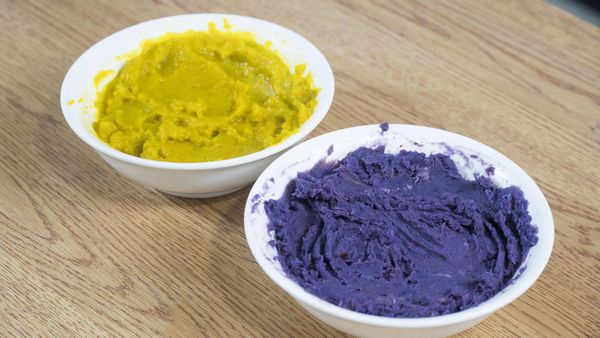
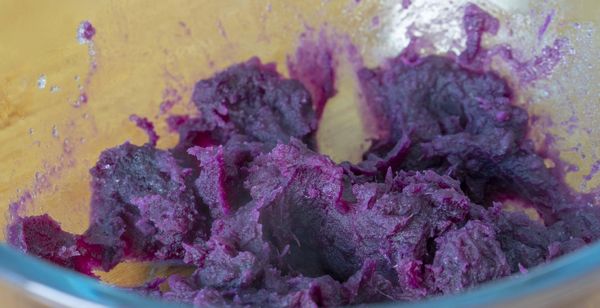
Purple potato mash is relatively dry. Take it out after 15 minutes of high heat; 4. After the purple sweet potato is cooked, first add 30 grams of milk, then add 20 grams of white sugar and press it into a puree.
Pumpkin has more water and sugar than purple sweet potato. It is enough to add 20 grams of milk and 10 grains of sugar. Mash with a fork in the same way, set aside to cool;
5. After the dough wakes up, take it out and divide it into two parts.
If your dough has started to rise, knead it a bit and roll it out;
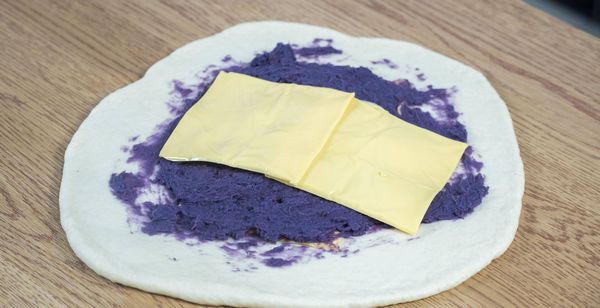
6. Roll out a large and thin dough about 3-5mm thick.

Spread cheese slices in the middle of the dough, then spread purple potato puree, and finally spread two slices of cheese on the surface;
7. Lift the crust around and pinch your mouth tightly.
The excess dough at the seam can be removed, and the pumpkin filling is the same;
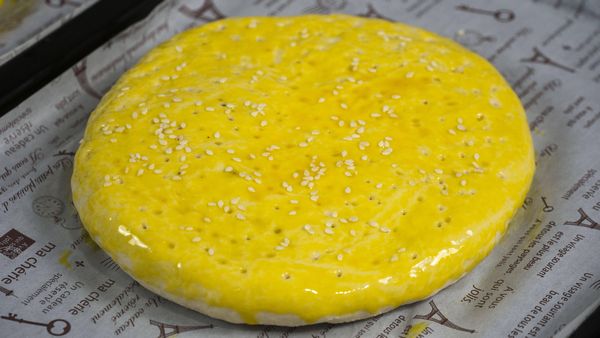
8. When everything is ready, turn the cake embryo upside down, flatten it slightly with a rolling pin, put it in a baking tray, and poke some air holes on the surface with a bamboo skewer;
9. An egg only needs the yolk part, stir well and brush on the surface of the dough, sprinkle with white sesame seeds;
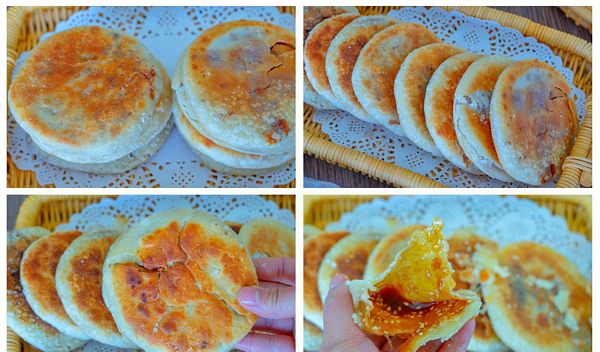
10. Put it in the middle layer of the preheated oven and bake at 190 degrees for 18 minutes.
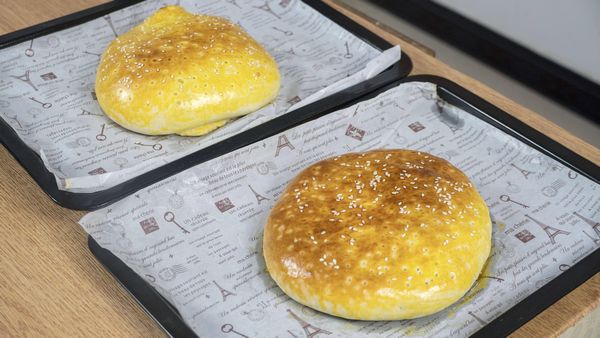

The baked cake embryo will slowly dance and bulge. Cover with tin foil after coloring, and it can be out of the oven when the time is up;
11. Move the bottom plate to the upper middle layer and continue to bake for 6-8 minutes..
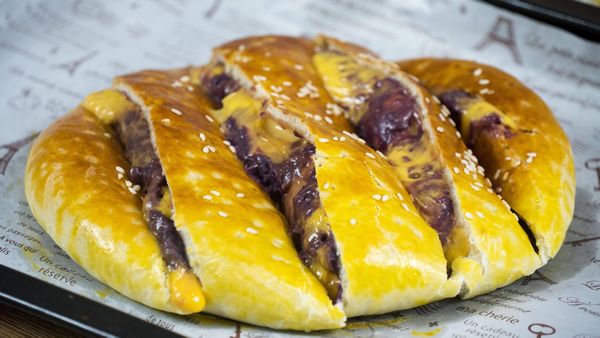
After all are baked, take it out and let it cool for a while, then cut into pieces and serve;
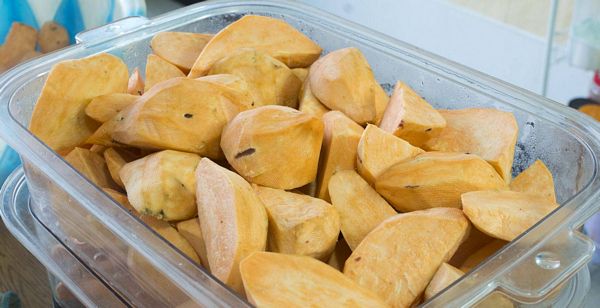
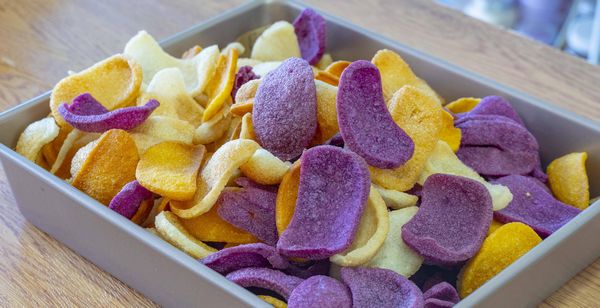
5. Potato chips
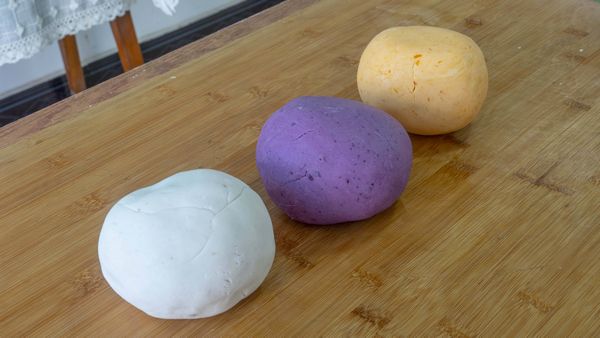
1. Today we are going to make potato chips in three colors.
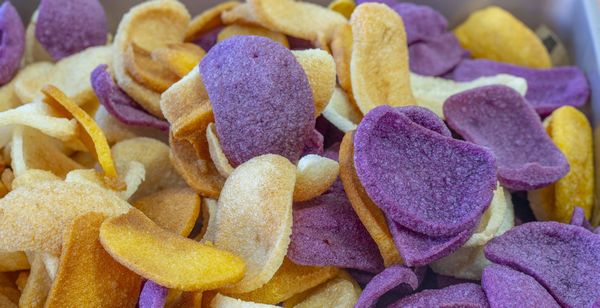
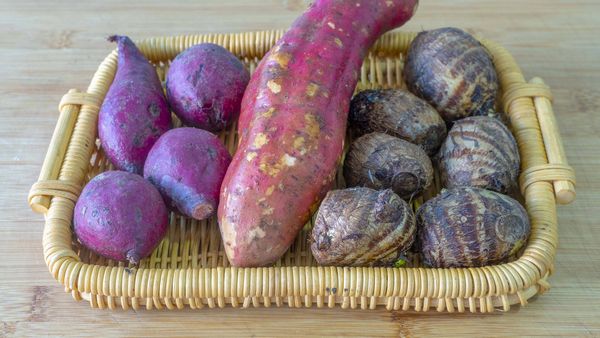
I used sweet potatoes, purple potatoes and taro. Let’s peel the skin first. The total weight after peeling is 600 grams, and each ingredient is 200 grams.
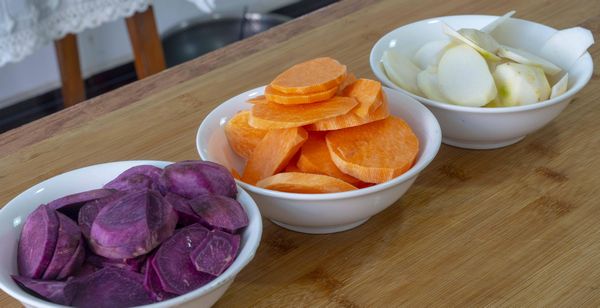
2. Then pour it into clean water and wash it again, then slice it.
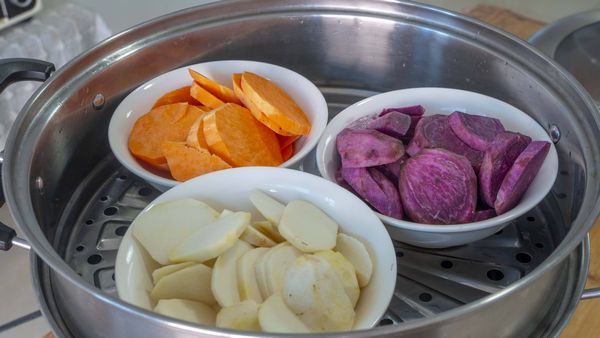
3. After cutting, put them on a plate separately, and then steam them in a pot.
Cover and cook over high heat for about 15 minutes.
4. After turning off the heat, take out the steamed sweet potatoes, purple potatoes, and taro and put them in the pot to keep warm.
5. Add 40 grams of sugar to the steamed sweet potatoes and mash them into mud.
7. Then take out the steamed purple sweet potato, add 40 grams of sugar while it is hot, mash it into a puree, add 200 grams of tapioca starch, and knead it into a dough.
Purple potatoes and taro are drier than sweet potatoes, so if it is difficult to knead, just add a little water before kneading. The kneaded dough will not be too soft, it will be a little hard but it will not spread out. Just like that, wrap it in plastic wrap for later use.
8. Finally, take out the taro. In the same steps and proportions, add 40 grams of sugar and press it into a puree, then add 200 grams of tapioca starch and knead it into a ball.
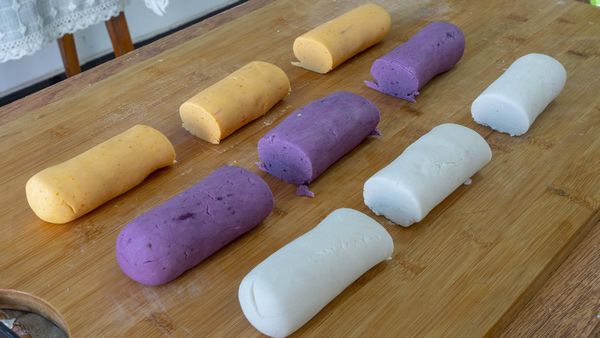
9. After kneading, move it directly to the chopping board, take out the other two parts, and knead them all into long strips.
10. Then divide it into small sections, and then cover the steamer with oiled paper to prevent sticking, or directly brush the oil, put the cut dough into it, don’t get too close, there must be a certain distance between each section, because the steaming process will Expand, and if you put it too close to the steam, it will all stick together.
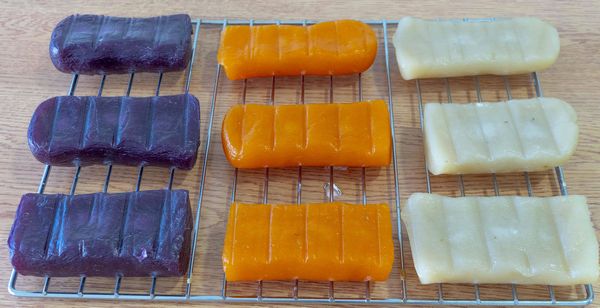
11. After the water boils, steam for 40 minutes on high heat.
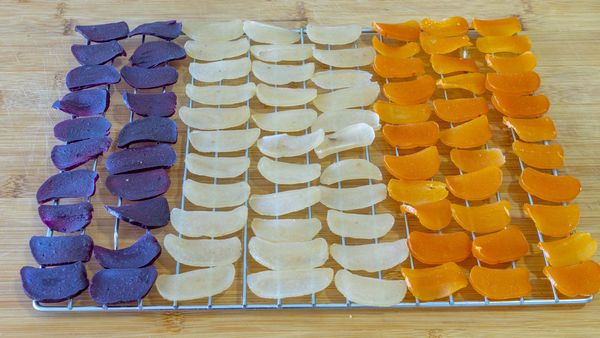
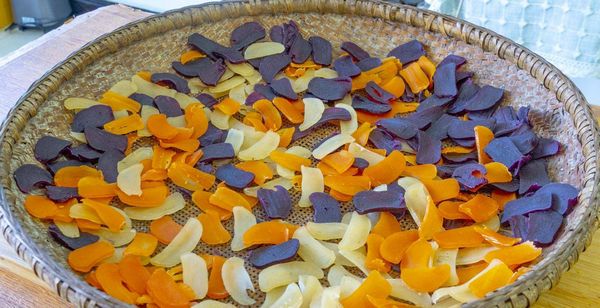
It must be thoroughly steamed. 14. After cutting all the pieces, put them evenly on the drying rack, and then put them directly under the sun to dry. Once completely dry, it can be put away.

This is the state of being exposed to the sun twice, and it is already very dry.
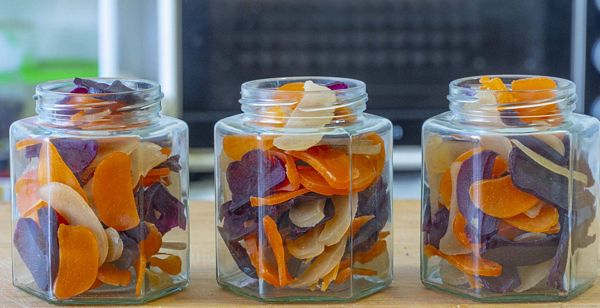
15. Our potato chips are basically ready. You can fry it when you want to eat it. If you can’t finish them, seal them up and store them in jars or bags.
Put them in an airy place so they don’t get wet again.
16. Start frying.
Pour the oil into the pan and heat the oil first. After the oil is hot, you can test the oil temperature with chopsticks. When the chopsticks go down and small bubbles appear soon, you can turn down the heat.
17. Then grab a handful of potato chips and throw them in the pan to fry. Potato chips will quickly expand and float in about 3 seconds. After all the debris floats up, quickly remove the oil control.
Don’t fry too much at one time. It only takes a few seconds for the chips to expand. If you fry too much at one time, it will be easy to get mushy if you don’t have time to fish it out. After all the potato chips are fried, take them out and control the oil.

Eat it after it is completely cooled, it is really burnt and crispy. Watch the video if you want to hear the sound. Really fragrant and crunchy, with hints of sweet potato, purple potato and taro.
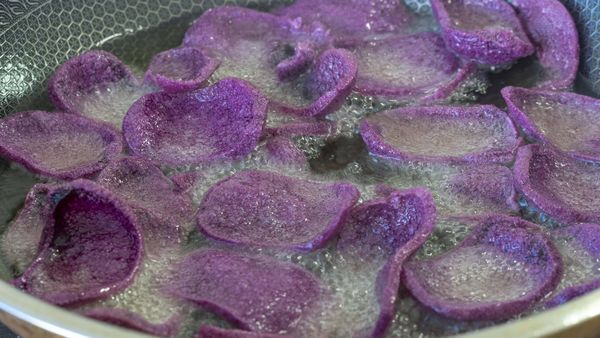
The flavor I make is sweet. It tastes crunchy and sweet at the same time. If you can’t finish it, you must put it in a box and keep it sealed, otherwise it will become soft after getting wet and it will not taste good.

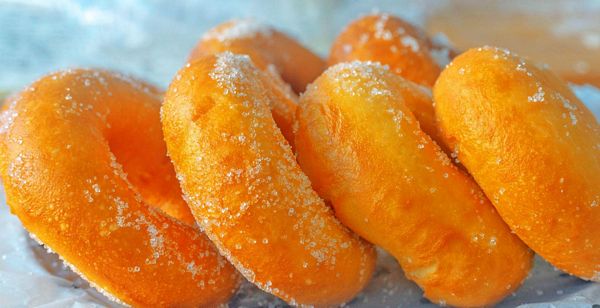
6. Donuts
300g flour, 60g sugar, 3g salt, 3g yeast, 1 egg, 120ml water, 20g edible oil, a little sugar
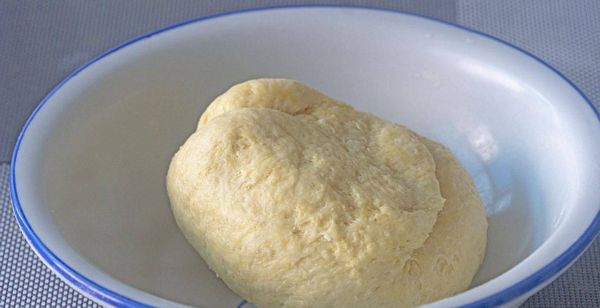
1. Knead the dough first, 300 grams of flour, 60 grams of sugar, 3 grams of salt, 3 grams of yeast, and 1 egg;
2. First mix the eggs and flour together, add 120ml of water, stir into a flocculent shape, then add 20g of cooking oil, do not knead until smooth, basically knead into shape and proof for 10 minutes, knead after 10 minutes until smooth;
3. We put it on the chopping board and continue kneading, just like washing clothes, knead until the glove film can be pulled out, cover and ferment until it doubles in size;
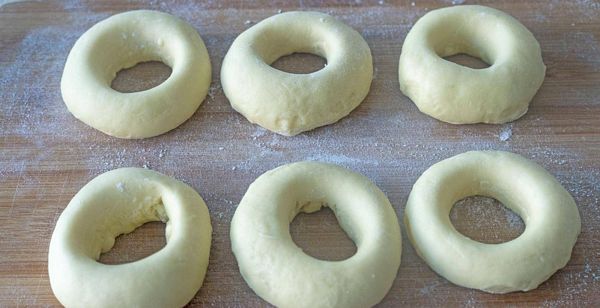
4. After the dough wakes up, exhaust the air first.
The dough is soft, you can sprinkle some dry flour, and divide it into small doses of equal size after exhausting;
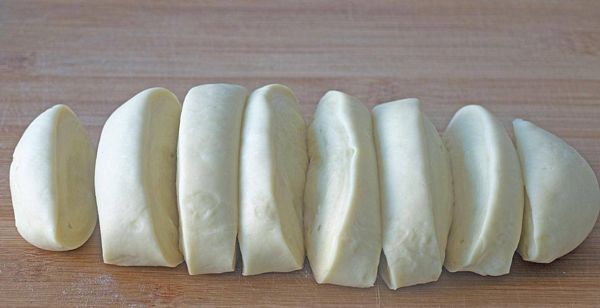
5. Continue to knead into a round shape, press down from the middle with a rolling pin, turn it over and arrange it, and stretch it a little.
It is best to wake up to 2 times the size;
6. After the dough wakes up, start to stir fry.
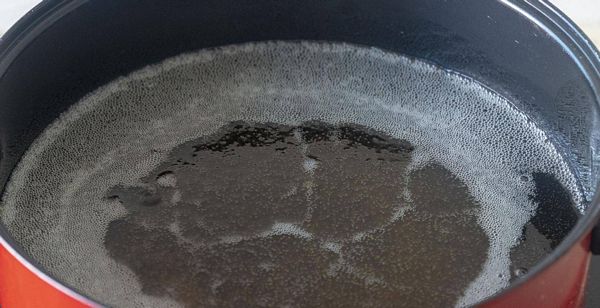
Heat donuts at 60% oil temperature.
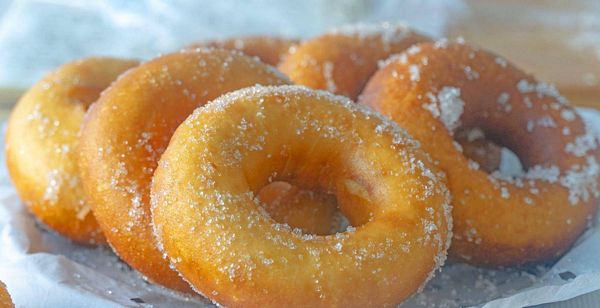
Fry it over medium heat, it will float up after a while, the volume will be much fluffier, and it will bulge, pay attention to turning over;
7. Fry until golden on both sides, then take out of the pan, coat with sugar while hot, and the sweet and soft fried donuts are ready;
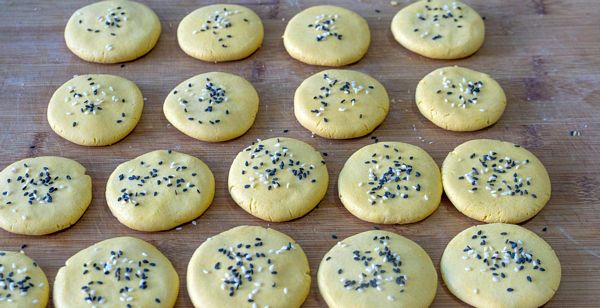
7. Pumpkin Pie
300 grams of old pumpkin, 60 grams of sugar, 350 grams of glutinous rice flour, appropriate amount of sesame seeds
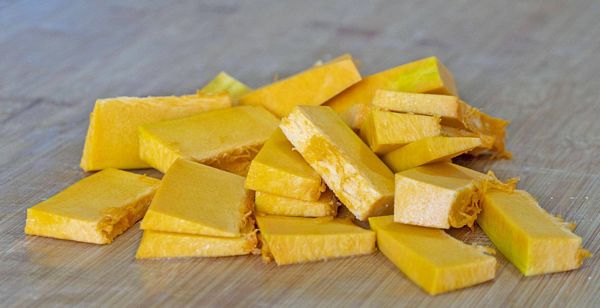
1. First prepare a pumpkin, peel and cut into pieces, weighing 300 grams.
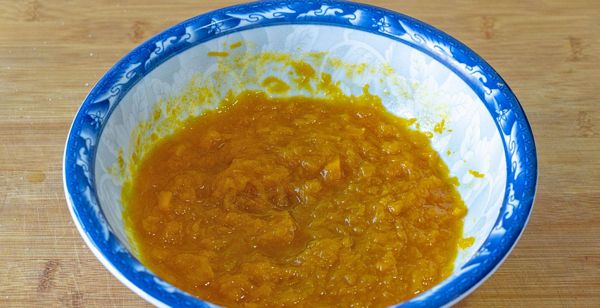
2. Then steam it in a pot, take it out and pour it into a large bowl after it is fully cooked, add 60 grams of sugar while it is hot, and mash it into mud.

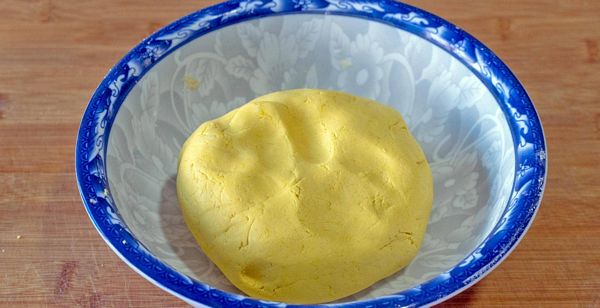
3. Then add 350 grams of glutinous rice flour in batches, stir to form a floc, and then knead it into a dough by hand.
The water content of pumpkin is different, and the proportion of glutinous rice flour will be slightly different. You can get a feel for yourself when you start kneading the dough.
4. Likes to crack when it is too dry.
Add some water at this time. Too thin is not easy to shape, and it will stick to hands. At this time, you can add some glutinous rice flour to remedy it, and knead it into a smooth dough with moderate hardness.
were able.
5. Then move to the chopping board to knead the long strips and divide them into noodles of equal size. Then knead it into a small ball, then flatten it with the palm of your hand, and a small cake will come out.
If the edges crack when you press, the dough is a bit dry. You can dip your hands in some water and continue forming a ball.
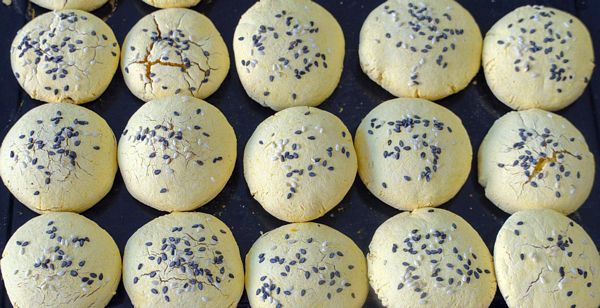
6. After all the pancakes are ready, brush a layer of water on the surface, sprinkle some black and white sesame seeds for seasoning, and then press the sesame seeds lightly.
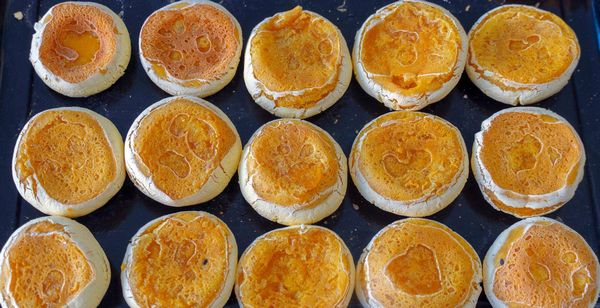
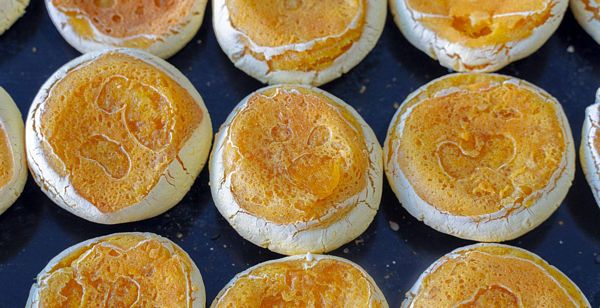
7. Then put the baking tray into the preheated oven, bake at 170 degrees for 20 minutes, and our pumpkin pie is ready.
Crunchy on the outside, burnt on the bottom, slightly puffed up in volume. Looks like I really want to take a bite.
I can’t wait to break open one, the color inside is golden yellow, very beautiful, it tastes soft, glutinous, sweet and chewy.
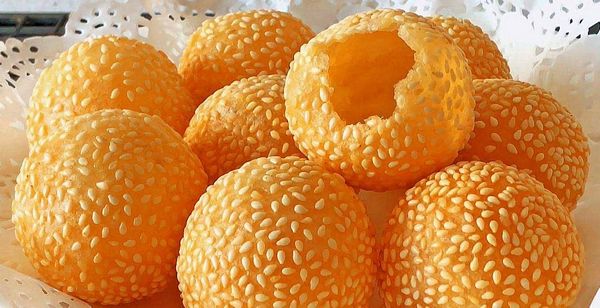
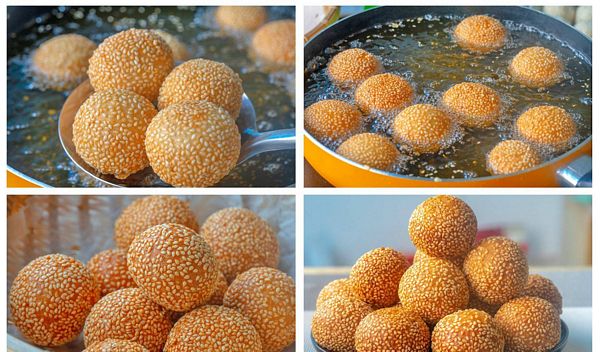
8. Ma ball
80g white sugar, 250ml boiled water, 330g glutinous rice flour, white sesame seeds, cooking oil
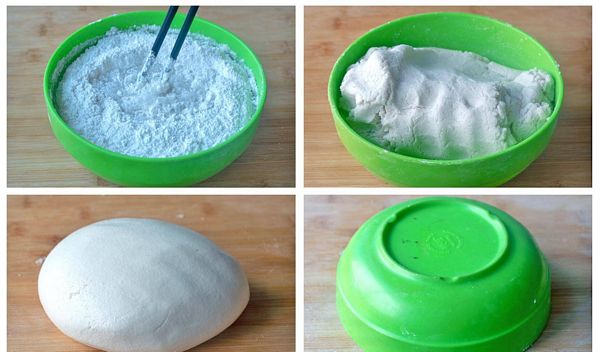
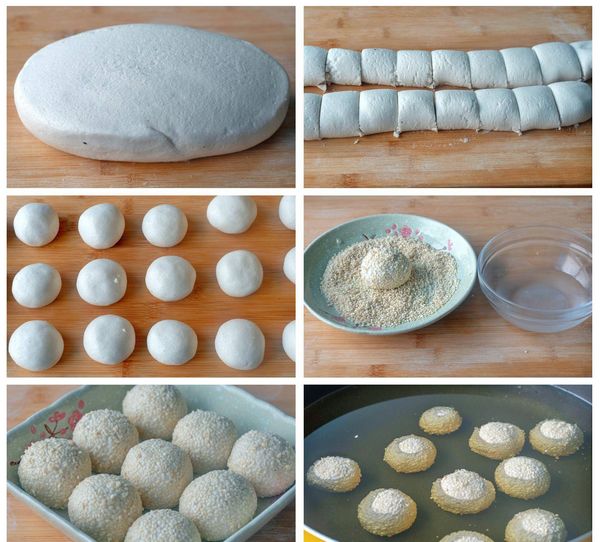
1. First dissolve 80 grams of white sugar with 250 ml of boiling water, then add 300 grams of glutinous rice flour in batches.
Here, hot noodles are used. After cooling slightly, add 30 grams of glutinous rice flour. The purpose of adding glutinous rice flour is to knead smoothly;
2. Knead the dough by hand.
My bowl is relatively small. After kneading the dough, place it on a cutting board and continue kneading until it becomes a smooth dough. Cover and wake up for 30 minutes;
4. Now pour the oil, pour a little more, put the dough into the cold oil, fry slowly with a low fire, this step is the key, if the oil temperature is too high or use a high fire, it will cause the hemp balls to burst, turn gently, to have patience;
Take out and drain the oil, and this crispy little sesame ball dish is ready to start.
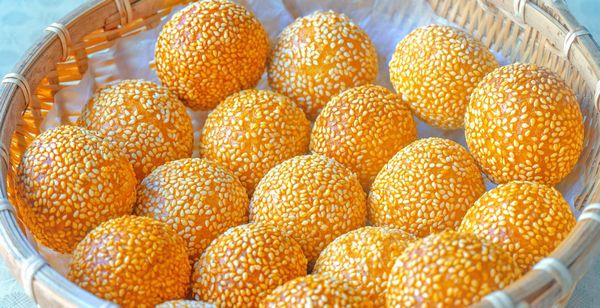
The sesame is really fragrant, and the glutinous rice has the effect of nourishing the spleen and warming the stomach, especially when it is hot, it is easier to digest.
9. Shortbread Cookies
Dough: 300g flour, 3g salt, 30g edible oil, 140ml room temperature water
Pastry dough: 150 grams of flour, 80 grams of cooking oil
Sugar filling: 80 grams of brown sugar, 20 grams of flour, 10 grams of white sesame
1. Knead the dough first: 300 grams of flour, 3 grams of salt, 30 grams of edible oil, 140 ml of room temperature water, knead the dough by hand, apply a layer of edible oil on the surface, and wake up for more than 1 hour with plastic wrap;
2. Make another pastry dough: 150 grams of flour, 80 grams of cooking oil, mix well and knead with hands to form a dough, wrap it up and proof it together;
3. Make a sugar filling that I especially like: 80 grams of brown sugar, 20 grams of flour, and 10 grams of white sesame.
After mixing evenly, it is a simple and sweet sugar filling; 4. After the dough wakes up, take it out, and it will not break when you pull it, which means it is very good.
Take it out and knead it into long strips. The meringue dough is also kneaded into long strips, and then divided into small doses, and the ordinary dough divides the meringue into equal parts;
5. Roll out the pastry dough into small balls, which are convenient for wrapping up later.
A small dose of ordinary dough, directly pressed into a small cake with the palm of your hand, wrapped in pastry, tightly wrapped, and tightly squeezed mouth;
6. After tidying up, gently press open and roll into small cakes.
It doesn’t need to be thin. Finally wrap it with a spoonful of brown sugar.
It will be broken and all embryos will be ready;
7. Put cold oil in the cold pan, put the noodles in, brush a layer of oil on the surface, cover the pan and fry on high heat, cook for two minutes on medium heat, turn over and continue frying until both sides are golden brown, then you can put it from out of the pot;
8. The sugar cakes I made are relatively large, and they are turned over 3 times before they come out of the pan.
In fact, it is relatively familiar. Uncracked cakes will puff up when baked, appear hollow and crispy. The sugar cake that has fallen off the residue can start;
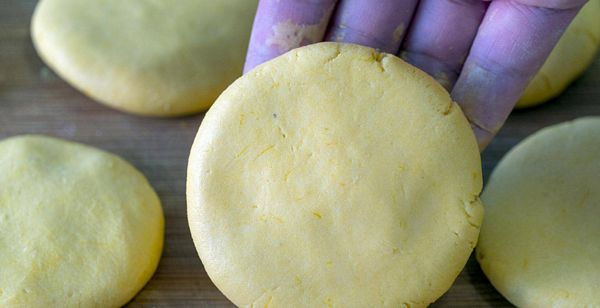
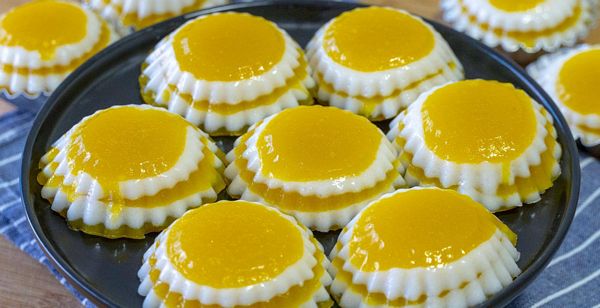
10. Horseshoe Cake
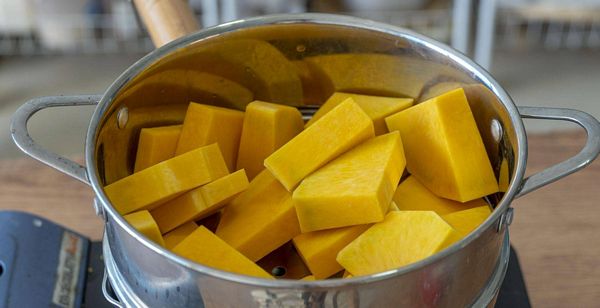
1. Use pumpkins to stack layers today.
Older pumpkins are first peeled and then cut into large chunks. Net weight 400 grams.
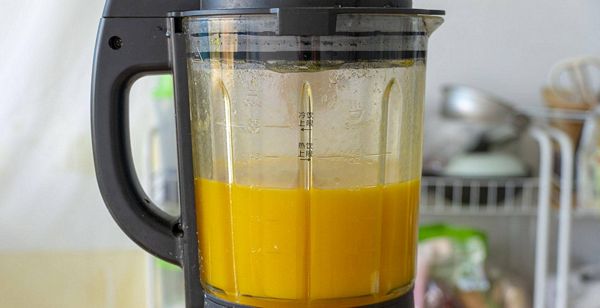
2. After steaming in the upper pot, take it out, pour it into a wall breaker, add 700 grams of water to make pumpkin puree, and sieve it once when pouring out, the taste is more delicate.
3. Then we boiled the pot and added 60 grams of white sugar, scooped a few spoonfuls of pumpkin paste that had just been filtered, and boiled over medium heat, first boil the white sugar.
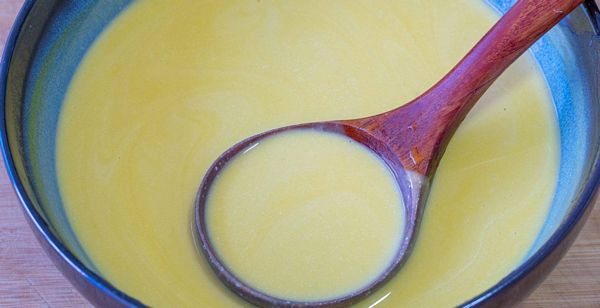
4. Then we add 120 grams of horseshoe powder into the bowl, then pour all the remaining pumpkin puree into the bowl and mix well, and then sieve if no particles can be seen.
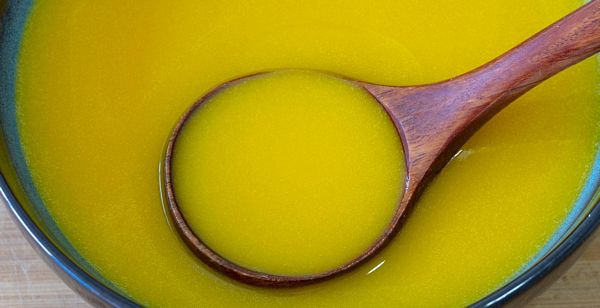
This is the yellow part of the paste.
5. At this time, the pot is boiling. After turning off the heat, scoop in 2 tablespoons of raw flour slurry, and then start stirring continuously until the flour slurry is completely boiled and becomes a transparent paste.
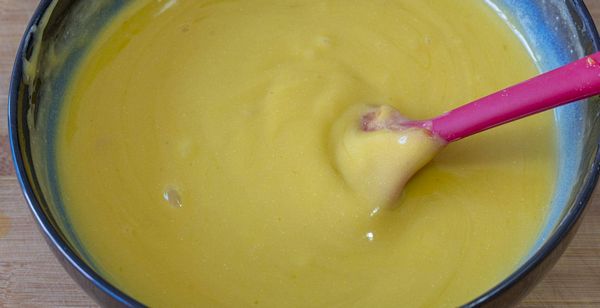
6. Then pour it into the remaining raw flour slurry while it is hot, and continue to stir evenly. Slowly, the flour slurry will become thicker and finer.
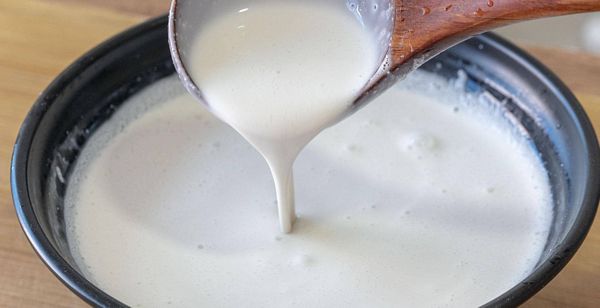
It’s in good condition, keep it aside.
8. There are milk and coconut milk in this powder slurry, which can be solidified without ironing.
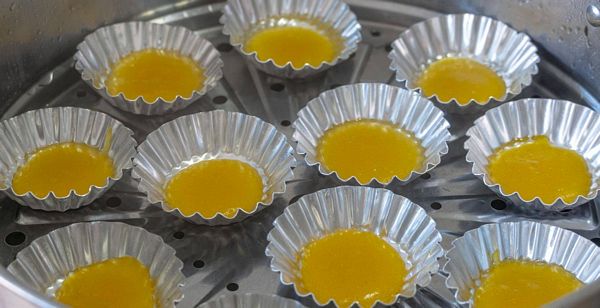
9. Next, the mold can be prepared. Both big and small molds are ok. First brush the oil to prevent sticking, cover the pot, and pour a layer of yellow powder on the bottom after the fire is boiled.
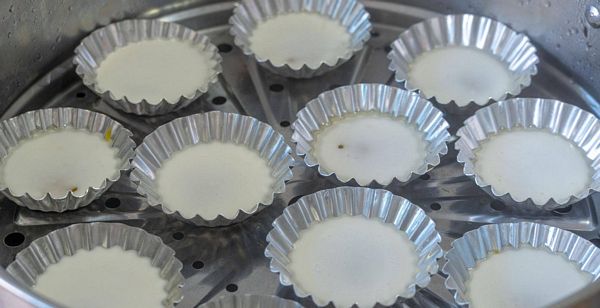
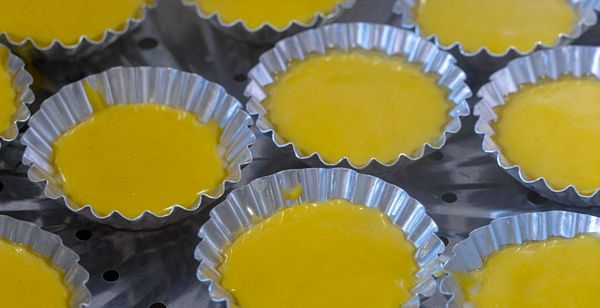
10. Then cover and steam for 3 minutes on high heat, then open the cover and pour a layer of white powder slurry, cover and continue steaming for 3 minutes.
The same is true for the back, with one layer of yellow and one layer of white, and the top and bottom are yellow and paste, so that the steamed color is more beautiful.
11. After it is all steamed, take it out and let it cool. There is still some powder left. The box I used was steamed.

The same layer of yellow and white is poured into the steamed one, but this box is relatively large. There is also more batter, so the steaming time should be slightly longer, and it can be completely steamed in about 5 minutes.
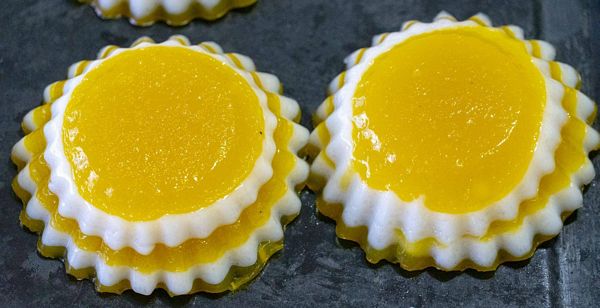
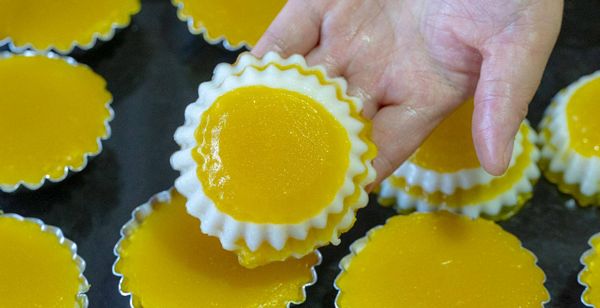
12. After steaming, take it out and let it cool. At this time, the small mold has completely cooled, and it can be demolded by gently breaking it with your fingers. When poured out, it is a complete water chestnut cake.
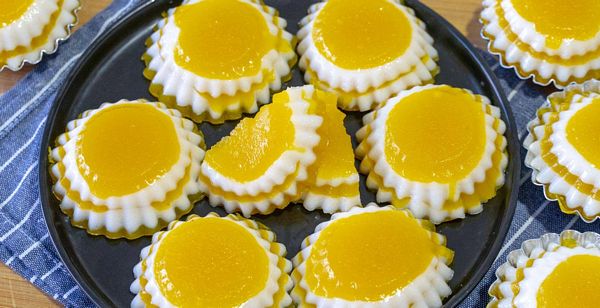
It smells of coconut, just the right amount of sweetness and firmness. Put it in the refrigerator for a while before eating, the taste is more cool and refreshing.
THANH NGA – LINKPIZ.COM